Vintage Style Crates - a little tutorial
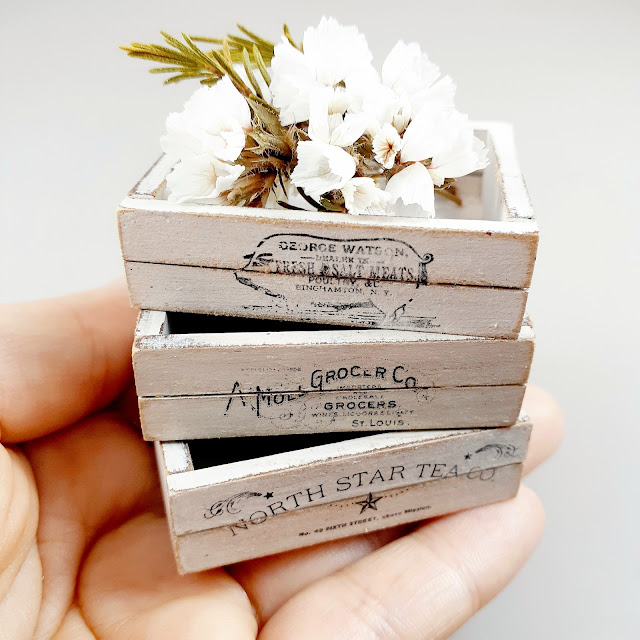
Occassionally I like to try out the furniture kits in my little shop. To be honest (one of the reasons) I chose to stock the crates is because I wanted to have a little play. And they did not disappoint. I'm loving how these turned out.
Here's a little how to if you'd like to have a go for yourself:
You will need:
-crate kit
-paint
-images (found at the end of the tutorial - or use your own)
-plain paper
-PVA glue or mod podge
-scissors
-cup of water
1. Put together the crates, following the instructions in the kit. Give them a coat of paint, sanding back the edges a little for a rustic look. It's best to use white or pale colours for this technique.
2. Using a laser printer, print the images on plain copy paper. Cut them out (to fit the side of the crate). Apply glue with a brush to the entire side of the crate and stick an image on, face side down. Make sure it is smoothed out. Leave to dry overnight or at least for several hours.
3. Dip your finger in the water and dab the paper until it is all damp. You should be able to see the image through the paper now.
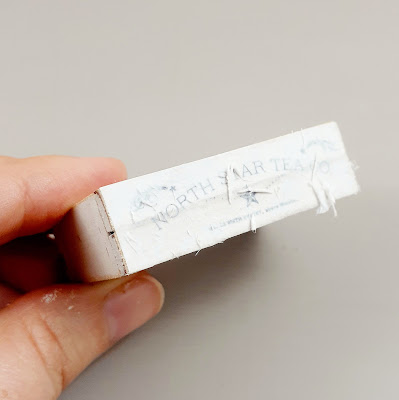
4. Gently rub over the image with your finger. The paper will begin to ball up and come away.
5. Continue gently rubbing over the paper until just the image is left. If your finger is too dry, dip it in the water again. If the paper is getting too wet allow things to dry before starting again. Work slowly and carefully.
6. Once the excess paper is gone and the image is exposed allow everything to dry. Add a final layer of glue/mod podge to seal the transfer.
That's it - well done! How are you going to use your crates now?
...
Here are the images to download. I found them at www.thegraphicsfairy.com and modified them to fit.


